Showing posts with label journaling. Show all posts

Thursday, 9 November 2017

Central Crafts Firenze Tiny Journal!

I'm so incredibly excited to share this with you guys!
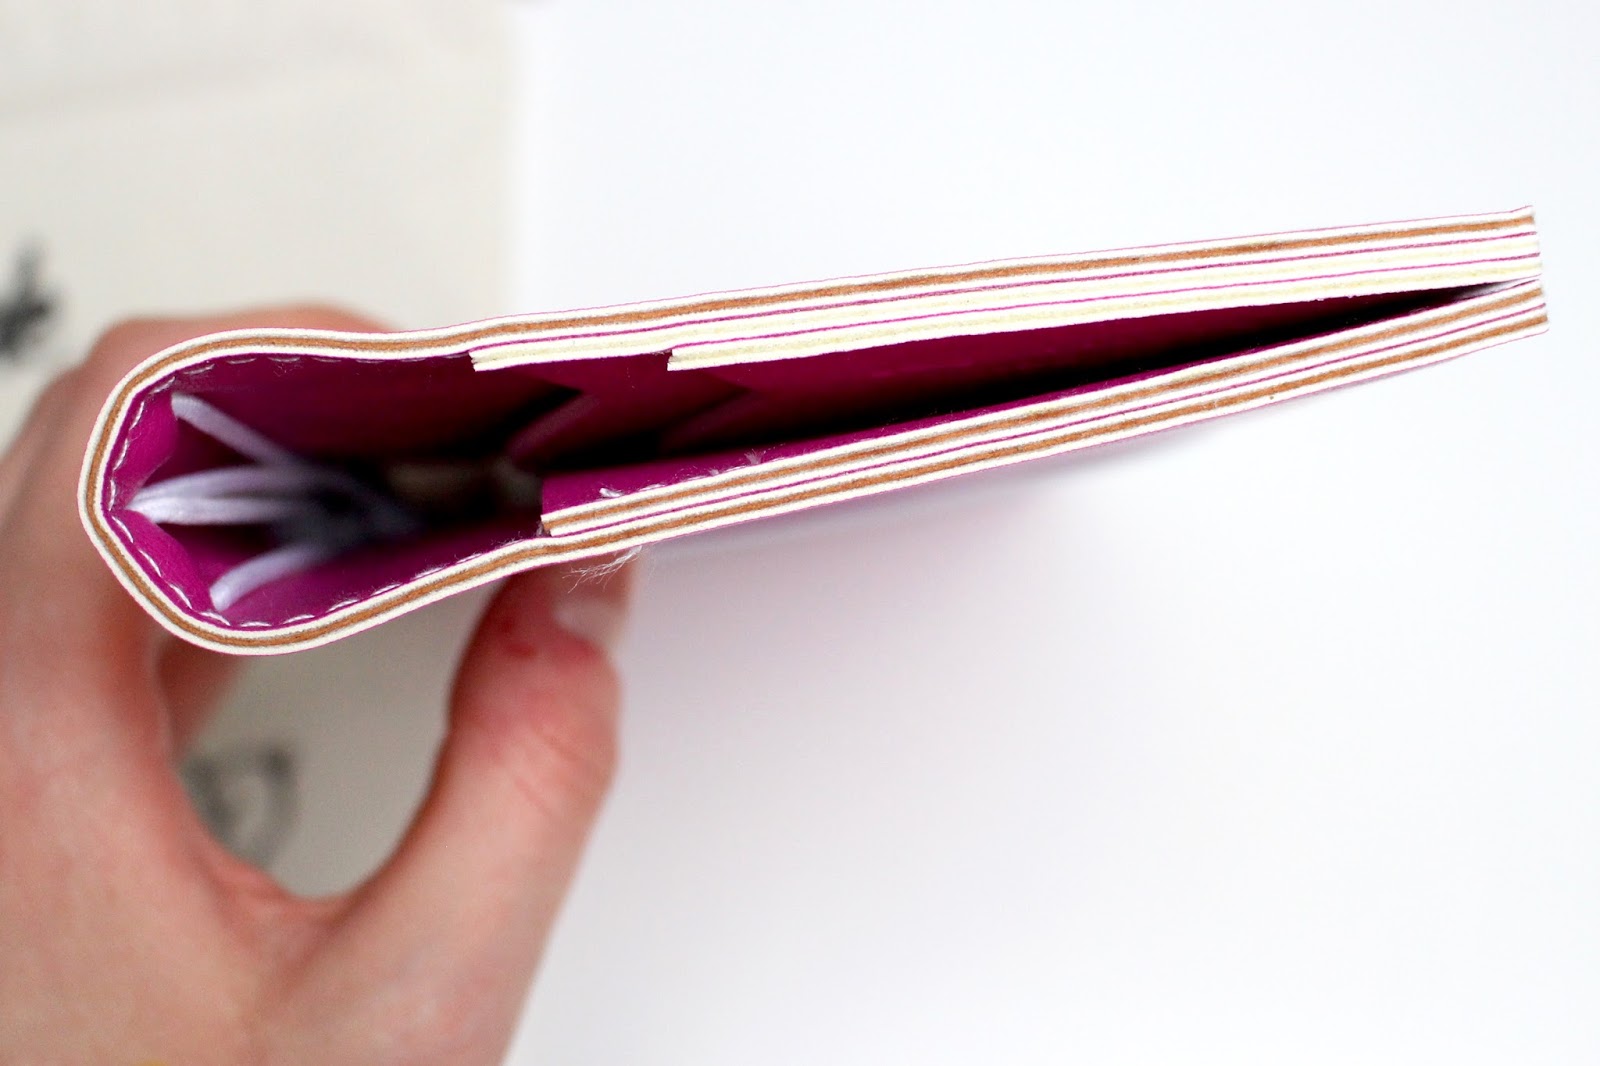
This is most definitely the smallest journal I own, and when I received it, I couldn't quite believe just how dinky it was! This was sent to me by Central Crafts, which is a site that offers a range of various products, including an amazing selection of handmade leather journals. It's UK based, family run business, that has been about since 1999. So they've had a lot of time to perfect the quality of their products, and it definitely shows!
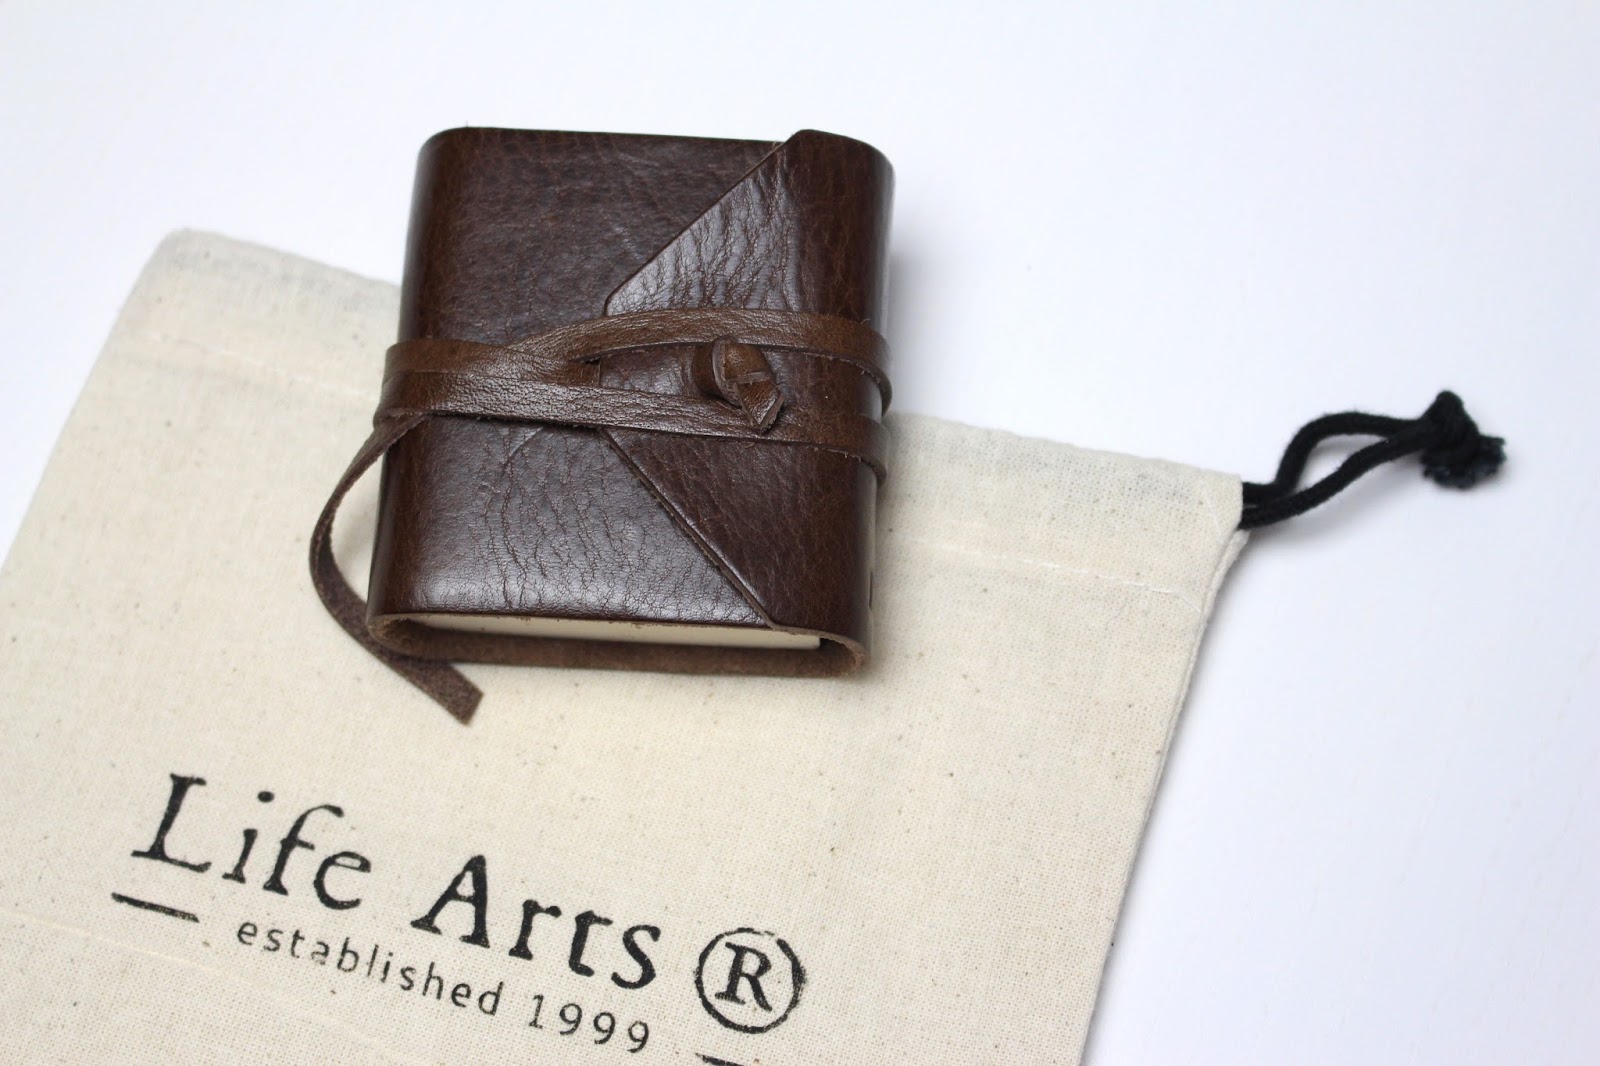

This one specifically, is the Firenze Classico Mini, and it's available for £10. 
It measures 6.5 x 6.5cm, and the pages inside are 5 x 6cm, so yes! It's a teeny little journal. But it is most definitely the cutest journal I own. 
It came in two colours, Chocolate & Tuscan Sun, I went for the Chocolate colour as I preferred the darker leather. It came in this little bag, so if you were planning to buy it as a gift for someone, or didn't want to scratch it. Then there's a little dust bag to keep it in.


The journal closes with a wrap around strip of leather, something that I haven't had on a journal for quite a few years now. I think I'm just so used to having journals with elastic closures for convenience, I've never really looked at this style before. But for a journal this size, there's really not that much wrapping to be done!
I love the chunkiness of the journal, even though it's small in size, it makes up for in quantity of paper inside. I feel like this journal would be so nice to note down daily perks, positive quotes I come across, and even sketching/painting things when I'm feeling inspired. Because it's so small, I reckon I will find myself using it more, it's not quite as daunting as having a large blank page in front of you.
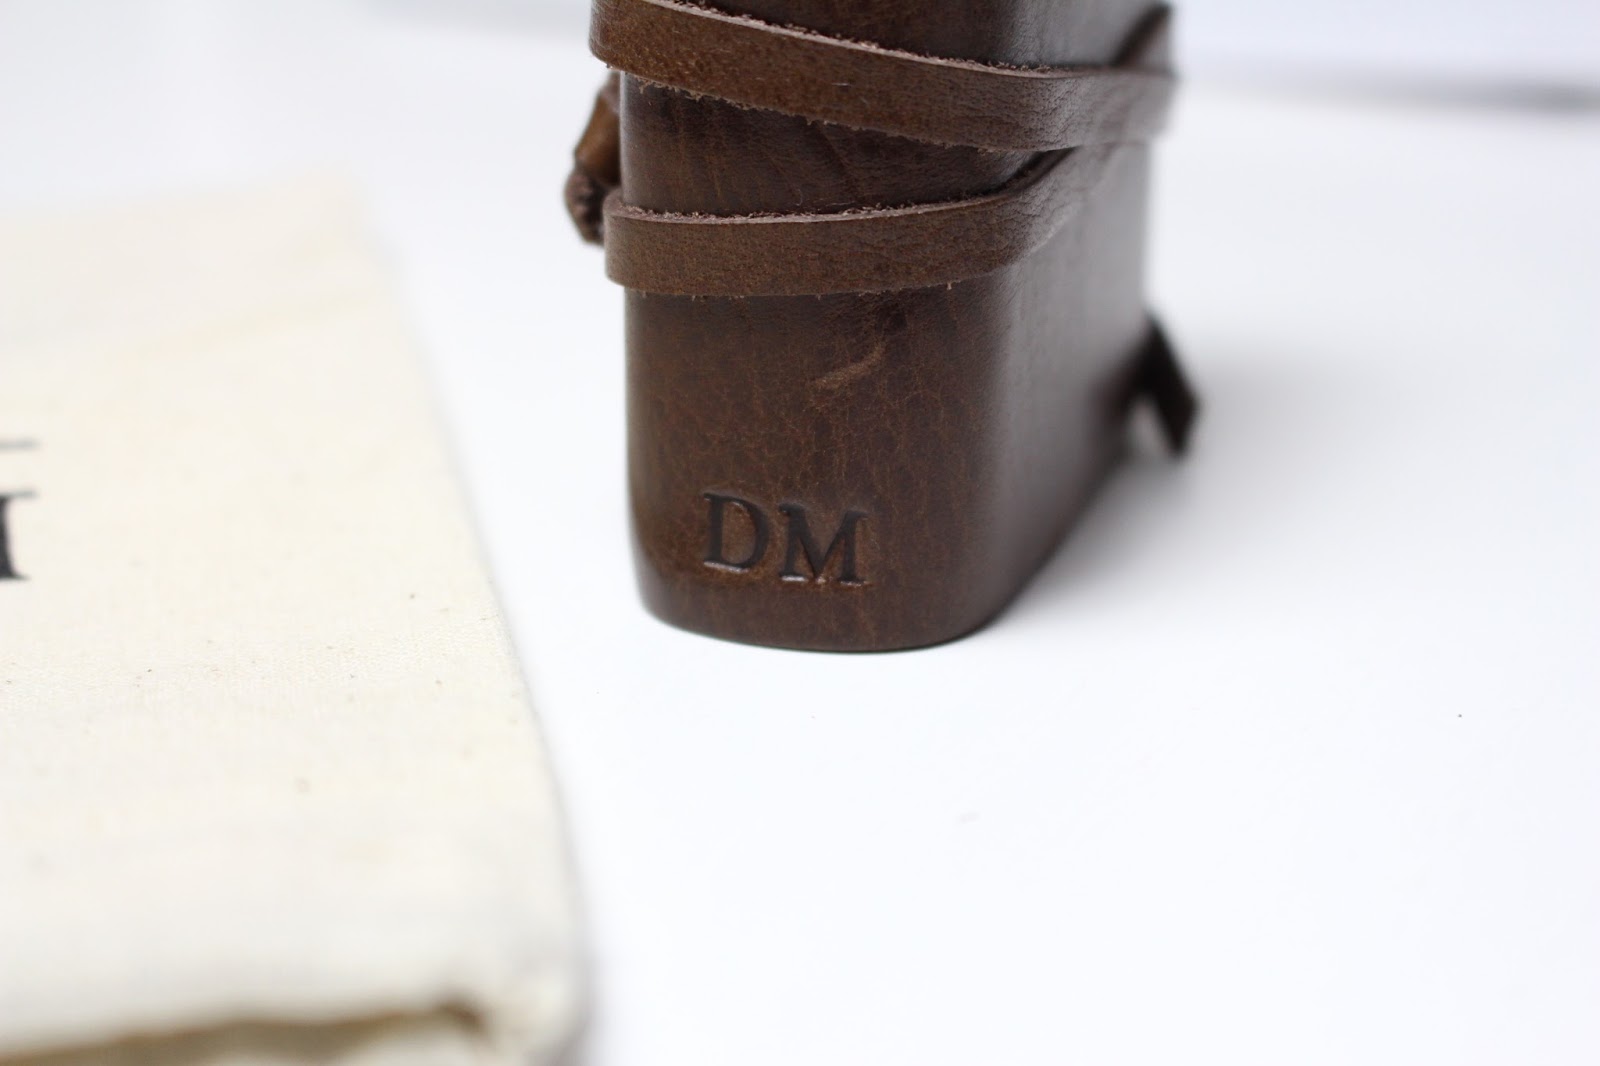

There was the added option of having it embossed, which I definitely had to get done! Most of the examples I had seen had shown the embossing on the front cover of the journal, but I asked if they would do it on the side/spine of the cover, and they said it was totally fine. I decided to get my initials on there, and I'm so happy with how it turned out! Embossing is an extra £4 for initials, or you can get one line of text (+£7) or two lines of text (+£10) on there too. 


The paper inside is cream in colour, and relatively thin, though it does feel like really good quality.
On the website it says that it is Italian acid free plain writing paper, and it also states that it is fountain pen friendly. I'm definitely intrigued to see which of my pens work the best on it.
The leather cover of the notebook has been made using off cuts from larger pieces of leather. I love that this beautiful little journal can come out of a few scraps that would have potentially gone in the bin if not. There are natural marks on the leather, and it does seem to be the type of leather that will mark up. Personally though I really like that, and I'm looking forward to seeing it wear as I use it.

If you would like to see what other journals Central Crafts has available, you can check out their whole journal range here.

You can find a direct link to this journal here.

They have also provided me with an exclusive discount code for you guys! Just enter the code MYGREENCOW when you checkout, for 10% off your order! (It expires on the 16th of November 2017)

I hope you enjoyed taking a look at this little journal! If you end up grabbing one for yourself, I'd love to see what you end up using it for?!

- Daisy X

MyGreenCow


*Please note, even though this journal was sent to me free of charge, this does not sway my views and opinions. I will always share my honest views on the product and company.

Monday, 7 August 2017

Fruity Journaling, Mrs Brimbles Stickers! July 2017

I decided to use my July Brimbles Sticker Club pack in my journal, because I have a little pile of photo's I still need to get stuck into my journal. There were a couple of photos that seemed to fit really well with the theme of this sticker pack, so I went for those!


Before sticking anything down I decided to add some watercolour in the background, just to break it up a bit. Plus a few of the stickers I wanted to use had white backgrounds, so it'd help them stand out a bit. I popped the watercolour onto an acrylic stamping block, and then applied it to the page so it didn't have any brush strokes. This also meant I could create a nice dripping effect when I tilted the page!
I used some of the border strip stickers, and some of the boxes to go in the background. Then I just layered up some of the smaller decorative stickers on top of the photos. I left the red circle sticker blank as I will write the date into that when I add the journaling.


Instead of leaving the bottom of the page blank, I added a little cluster of stickers down there, just to balance to the two corners of the page. You can also see that the orange sticker is covering a staple that was showing through from the back of the page. I debated whether to actually take the staple out, but decided to just cover it and hope for the best haha. It's a bit lumpy, and kinda noticeable, but hey. it works for me, so I'm going to leave it like that!


I was going to leave the top left section of this page clear for writing, but I realised the black and white spotty box sticker would most likely make the writing blend in a bit too much. So I grabbed a few of the arrow stickers and popped them in the gap instead. I'll still add some writing to the yellow water coloured section, but hopefully the arrows will help to make it look less like there's something missing from there.


I love the colours of this sticker collection, and I don't think I could have used any better stickers to document these photos. They seem to reflect the mood of that day out just perfectly!
I still have lots of stickers left over from these sheets, so I will most likely use them in future journaling spreads! I might even try using some in my planner too. 

- Daisy X

MyGreenCow

Saturday, 30 July 2016

My Pretty Week Order - TN Inserts | June 2016

Well hello! It's been a while, I know. But I'm back, and I have a lovely little order to share with you all!
A few weeks ago whilst I was up north for a couple of weeks, I placed an order on My Pretty Week. I've been searching for some other places that sell TN inserts, I came across these when I was going to buy some dividers that I saw advertised on her Instagram. I'll go into more detail about the dividers another time, I primarily want to  have a little chat about the TN inserts I purchased.


The two inserts I went for were a donut one, and one with Daisies on (this one I got for obvious reasons).  They all came beautifully packaged, each in separate plastic sleeves. I went for one with plain pages and one with grid pages, I wanted to know the quality of both. I'm a fan of both plain and grid paper when it comes to my TN inserts. I usually use my grid paper inserts for straight up writing, and then plain paper for my creative journaling. Though the grid squares on this paper are a lot bigger, I'd say they were about 1cm squares instead of the classic 5mm ones.


I have started using the plain paper donut one for my next journal in my Travellers Notebook, so you will see that pop up in my future videos. I have just uploaded my first journaling process using it today, so I'll leave that linked at the bottom of this blogpost if you want to have a nosey.
I'll be sure to give my full opinions once I've filled up the insert. So far though the only thing that's taking a bit of getting used to is using white paper instead of an off white/cream colour which I usually use.


As far as decorating the front goes, I decorated my last insert with stickers. This one I'm probably not going to decorate quite as much. I will of course label it as 'two' so I know what order my journals go in. But I like the donut design, it's already very busy so I don't want to over load it!

If you want to grab the exact things I bought, then you can do so here:


If you want to have a look at the rest of the My Pretty Week shop then you can take a look here.

Check out my first journaling session in my new donut insert here:


- Daisy X

MyGreenCow

Friday, 3 June 2016

Raspberry Pink Zinnydori, First Impressions & Review!

ANOTHER dori? Yep, yes indeeedy!
At the moment I am slightly obsessed with my creative journaling, so why not embrace it!
I own a lot of patterned fauxdori's, but not many plain ones. So when Zinnia from Simple Heart asked if I wanted to review one of her fauxdori's I of course said yes!


I had seen the Zinnydori's about before on social media, and I loved the look of them, I will get to the specifically unique part that always caught my eye in a little bit.
But first of all, what I received in the mail was the Zinnydori, in a zip pouch (perfect if you want a little extra protection in your bag), and also an insert & some adorable Totoro stickers! I didn't know I would be getting a few extras, so thank you Zinnia!


The Zinnydori itself is actually one of the heaviest empty dori's I own, I genuinely really liked the fact that it is kind of weighty. It means that even if I don't have it full up with inserts, it will still feel a bit chunky. It is made of PU leather (fake leather), and it did have a very strong gluey smell to it when I first took it out of the plastic. The smell did fade a lot after I'd had it sitting on my desk for a few days though. 
The main section of the cover is double layered by the looks of it, and it has a some what squishy feel too it, which I personally love!


This is the unique part that always caught my eye when I saw it in photos! The pockets! They are just soooo pretty! They have a slight wave to them so even if you don't fill them with stuff, they will still look pretty.
The dori has four elastic's, the two middle ones go through the same holes so they can be used as one. I think the fact that you can fit up to four inserts on the original elastics without adding more is really great.


This was the insert that she sent me, it's exclusive to her shop so you won't find it anywhere else. 
I personally absolutely love it! The style of this insert is totally up my street. Bold, fun and simple is something I tend to look for in things like this. I don't like them looking boring, but I don't like them over decorated! There's plenty of space in each section too, so if you wanted to journal creatively in here, you can do.


Overall I am very impressed with this dori, the smell was a bit off putting to start with as it was very strong, but thankfully that's faded a lot since I've been using it!
If you want to watch the video I did sharing my first impressions, then you can do so here:


I have a discount code for you guys to get 20% off anything on her shop! Just use the code GREENCOW20, it expires June 30th though so take advantage of it! Take a look at her shop here.

- Daisy X

MyGreenCow


*Please note, even though these products were sent to me free of charge, this does not sway my views and opinions. I will always share my honest views on the product and company.

Monday, 2 May 2016

Brimbles Box Journaling Pages! April 2016

*Blogpost was originally put together for the Mrs Brimbles Blog*
With this month's Brimbles box I decided to use the contents to decorate my journaling pages.
I recently went to see Zootropolis at the cinema with my brother, and seeing as it was a kind of fun film, the April box had lots of fun bright things that just went really well with what I was journaling about! I absolutely loved working with such bright colours, and fun stickers!


These journaling pages didn't have any photos on, I decided to just use the things I had collected during the day. We actually got given a free sticker book and stickers when we went to see the film, so of course I didn't turn that down. It was a lovely day spent with my brother, and I also beat a few anxiety worries, so definitely a day to be documented! Hence the use of the pink 'Documented' sticker on the page on the left.


I of course kept the cinema ticket to stick in! One of the many reasons I like buying tickets at the cinema rather than online, is because you get a 'proper' ticket. They look a lot nicer in a journal or scrapbook! We also got charged for teen tickets rather than an adult, which was highly amusing. I'm nearly 22 and my brother is 19... But hey! All I said was 'two tickets to see Zootropolis please' so I'm not going to complain if they want to charge us less. I used the cry laughing emoji sticker to represent the 'lols' we got out of that.


I used the rainbow dashed journaling card from this pack of ephemera by Mrs Brimbles, to create a little flap on the page. I stuck one of the stickers we got from the cinema on the front, and decorated it with the purple & pink heart washi tape, and some arrow stickers from the sticker sheet that were in my Brimbles Box. I also used from film strip washi tape that I got on eBay.


On the other side of the flap I stuck another one of the stickers we got, and I popped one of the little sticky tabs from the sticky notes that were in my Brimbles Box. I tend to use any sticky tabs that already have words on, like stickers. Because the film sticker was quite dark, the sticky tab really helps to break up all the dark colours. Without it there, it would have just looked really glum and bland.


I decided to keep my bus ticket from the trip to the train station as this was one of the things I was most anxious about doing. It's a nice little reminder that I managed it, and didn't freak out! I stapled this to the page so it could easily be lifted up, and I could put things underneath it.
Underneath I added one more sticker we got at the cinema, and used this orange 'Admit One' washi tape, which was also from eBay, to decorate around it. I added one of the striped flag banner stickers from the sticker sheet in my Brimbles Box to the corner of the Zootropolis sticker. It felt a little bare without something there, so this small addition helped to fill the gap.


At the bottom of this page I wanted to add a little cluster of washi & stickers, just to help balance the pages out a bit. I went ahead and added some more of the film strip & heart washi, and then added this yummy looking donut sticker! Once we got home I ended up having a nap, watching tv & eating 'crappy' food, even though I didn't have a donut, the donut does represent the type of food I went for, haha!


Once I'd done the journaling I decided to go over random words and phrases with the highlighters that came in my Brimbles Box. I love this technique when it comes to journaling, but I've never had more than two colours of highlighter to do it with. Now I have a whole set, so I did go a little bit crazy! I love how it turned out though, there was so much colour going on around the edges of the journaling, the written section looked very bare in comparison. 

Hopefully you enjoyed seeing how I used a lot of the items from this month's box! I really enjoyed using them to decorate my journaling pages! 

- Daisy X

MyGreenCow

Wednesday, 30 March 2016

Paperchase Blogger Event, Journaling Pages

After going to the Paperchase Blogger Event at the start of the month, I of course had to do a bit of journaling about the day. This is how the double page spread in my Lyra & Co Lyradori turned out!


So the colour scheme I went with was inspired by the photo of my yellow converse, and my train ticket. I got out my watercolours and whacked down some yellow & orange in the background. On the right hand page I stuck down some of the fruit tape I'd bought from Paperchase about a month ago, because the colours on it were very warm, so it fit with the other colours very well. I got my photo's printed, and gathered together all the things I wanted to include on the spread. Then I figured out where I was going to place things. This is sometimes the hardest part, so if you are struggling, don't panic! I still do too sometimes, just stick with it!


At the top I decided to stick the photo of me, Anna & Chloe. I used some different tapes to help frame the photo (Yellow Star Washi Tape & Thin Gold Glitter Tape, from Cloudy Cow). I also used some grid sticky notes from a set I'd got from HEMA. The 'Hello Friend' sticker was from a set I'd gotten ages ago but I don't remember where from, and the Camera & Heart stickers were from a Simple Stories Carpe Diem sheet.


I was debating whether to stick down my train ticket, or make it into a flap on the page. Whilst I was trying to decide I paper clipped it to the page to keep it in place, and ended up just really liking the look of it. I think it helped that the paper clip was shaped, so it made it look like it was meant to be there, rather that just like I'd pegged it there temporarily. I've found a new love for using Paper Clips in my journal, these heart ones are by American Crafts & I got them from Paperchase.
I used some Yellow alphabet stickers by Doodle Bug Design Inc, and chose to title the page at the bottom instead of the top.


As I had printed off quite a few photo's from the day, I decided to add in a journaling card as a flap and then stuck on some photos. I rounded some of the corners so it made them fit in with the shape of the card a little better. I added another heart paper clip at the bottom to hold one of the spare photos I had onto the other side, which wasn't stuck down. On this side of the flap though, it just looks pretty!


At the bottom of the page I added the words 'blogger event' in some of my favourite typewriter style alphabet stickers, from Hobbycraft. Along with the date of the event and the date I created this page. To fill in the blank space I decided to stick down a heart sticker from one of the Simple Stories sticker sheets. Hearts and other generic 'pretty' shape stickers like that are very handy to have in your stash for times like this, when you just want to fill in a gap on a page without something too distracting.


Underneath the flap I have a lot of journaling, along with the spare photo I had paper clipped onto the inside of the flap. I have the tag from the Pineapple cup I got in my goody bag which I stapled to the top of the page, and then covered the staples with some gold glitter tape and some washi tape from Freckled Fawn which says 'remember today'. The 'MAR' circle is plastic so is slightly transparent, I just stapled that down in the corner. Then I added a couple of stickers at the top of the journaling section.

I'm very happy with how it all came together! If you are ever struggling with figuring out a colour scheme to go with, take a look at the photo's you are going to include on a page and see if you can pick out some colours from those.

- Daisy X

MyGreenCow


*Please note, some links in this blogpost are affiliated.

Monday, 22 February 2016

Japan Fun Box Journaling Page!

If you saw my most recent vlog (here), you will have see the unboxing I did of the Japan Fun Box. Well after opening it and trying all the goodies with my family, I decided to journal a little bit about it because it was just so much fun.
I suppose you could count this as a kind of review at the same time, because I wrote down all my thoughts on the box, in my journal.
I did find this page a lot harder to put together because all the photo's had so many different colours in, but used what I hard available and I'm happy with the outcome!


I decided to use a double spread, as I had quite a few photos to stick in. I printed them off in a few different sizes on my Canon Selphy printer. I decided to have my favourite photos on the outside and then put the other ones underneath. 
I used watercolours to incorporate similar colours on both sides, and kind of bring the two pages together a little better (I highly recommend getting yourself a set of watercolours for journaling, it's amazing what a splash of colour can do to a page!). I went through my journaling card stash and pulled out some that went with the colours in the photos. I then did the same with my washi tape stash. Once I had lots of things in front of me, I went ahead and put the page together!


I used this frame card to go over the bigger photo collage of my dog. I didn't want to stick it down completely because it would have hidden some of the shots, and I didn't want to lose them. So instead I attached it as a flap using some strawberry washi tape (here). I planned to have my photo of the strawberry sweets on the bottom section of the opposite page, so putting this strawberry tape up here helped to balance that a little.
I added two dates to the page (I tend to do this a lot with my journaling pages), the first date is when it happened, so when we all sat down and went through the Japan Fun Box together. Then the second date is when I decided to journal and put this page together.

(Emoji Stickers are from eBay. Thin gold glitter tape is from Cloudy Cow. Triangle Paperclip is from HEMA. Font stickers are from a Lah De Dah set from Hobbycraft. Yellow arrow sticky note was a gift.)

This is the other strawberry section I was talking about. This flap was originally the backing to a pack of stickers, it had a wood effect (which you will see when I show you the inside of the flap) and on the back I decided to cover it with some 6x6 paper which looked a little bit like newspaper print.
I added a photo of my two favourite things from the Japan Fun Box! I knew I'd like the strawberry sweets from the get go, but the Alfort chocolate biscuit things surprised me! As soon me and my brother took a bite we looked at each other and knew exactly what they tasted like. They basically tasted like childhood in the form of chocolate iced gems.
Anyways I added some washi tape decoration some stickers, and a little caption on a yellow arrow sticky note.

(Meh heart sticker from Ban.do. "Yay!" sticker from Anke Panke. Totoro sticker from Cloudy Cow)

When you open the flap, this is what is on the inside. I decided to add another little journaling card under here as a flap, because I wanted to make sure I had space to stick down all the photo's I'd taken.
There were a few things in the Japan Fun Box that I wasn't too keen on, and funny enough no-one in my family was up for trying the wasabi nuts!
On the right hand side I attached one of the sweet wrappers to the flap with a triangle paperclip. It had some adorable little characters on it so I wanted to keep on as a memento. It's a really casual way to keep something on a page, but I love attaching things with paperclips.


I attach all the flaps into my journal using strips of washi tape, I know there's multiple ways to do this but I simply have a strip on the front and on the back! I was tempted to add some thin washi or little corners to the photos on this mini flap, but there wasn't a ton of space so I didn't want it to end up looking messy. I think there's enough going on around it to keep your eyes occupied!


For a change I chose to handwrite some little captions straight onto the page. I've not done this in a while (mainly because I've got so many awesome stickers to use in my journaling stash) but also because I'm always so terrified of ruining it! But I've realised that I'm not scared of going into to a project with no plan, so I shouldn't be scared to just try out any ideas I have for the page! If it turns out rubbish and bugs me I can always glue the pages together and try again.

(Typewriter font alphabet stickers from Hobbycraft. Pig sticker from Pipsticks.)

So yeh! That's how my journaling pages turned out for the Japan Fun Box. I've left the journaling on the pages un-blurred so of course feel free to read about it.

Overall I think the Japan Fun Box is very reasonably priced for the amount of stuff you get in it, the variety is great (it's not just sweets and chocolate, there's savoury items too!) and of course it's free delivery which is great. The only reason I wouldn't want to subscribe to the original sized box right now is because of the amount of stuff that didn't get eaten. I would consider the smaller size though as the whole experience was absolutely hilarious. The foods we have in the UK are so different and it was really nice to get a taste (literally!) of Japan!!

If you'd like to check out the Japan Fun Box then you can do so here.

- Daisy X

MyGreenCow

*Please note, even though the Japan Fun Box was sent to me free of charge, this does not sway my views and opinions. I will always share my honest views on the product and company.

Tuesday, 5 January 2016

Happy Mail Box, Christmas Journaling!

So in November I received the Happy Mail Brimbles Box, inside was lots of Christmassy goodies which were of course intended to be used to create Happy Mail! But between then and now, things have been so busy, I just have not had the time to write any letters to my penpals. I thought I was moving, then it was postponed. I went up north for a few weeks, and left my camera at home 300 miles away. Everything was all last minute and completely all over the place.
BUT over the past week I've finally managed to catch up with myself a little bit! I decided to go through my November Happy Mail box and use some of the things in there to decorate my journal pages.


Just before Christmas I bought myself the Canon Selphy printer, so I'm now able to incorporate photos into my journaling! In my Christmas planning insert I left some space to add some journaling, so that's what I am showing you today.
I thought it'd be nice to have the planning, the progress and some journaling from Christmas 2015, all in one place. I might also keep this insert to use again next year as there's still plenty of space left in it even after I added a few pages of journaling!


One of the things I wanted to use were the adorable Christmas Gift Tags, I think they work perfectly to fill in some blank space and decorate the page. I layered it up with one of the Santa Sticky Notes, I feel like these have a massive variety of uses instead of just being used to jot notes down on.
I chose to round the corners of most of my photos, but for the one of my dog I wanted to add some little kraft paper corners to it, just to mix things up. I did this by simply cutting the four corners off of a kraft paper sticky note from Tiger, and then gluing them over the corners of the photo. I used my nail to dent them down so the edge of the photo's showed through, and gave a little bit of a '3D' effect.
The Owl sticker is from a 2014 Paperchase set, so I'm not sure you can find this in stores anymore. 


At the bottom of the page I used the Christmas Ribbon & the Fair Isle Christmas Washi Tape from my Happy Mail Brimbles Box! I also used some other washi tape I had and the Gold Glitter Tape from Cloudy Cow. The layering I created at the bottom with these tapes and ribbon, is one of the thing I enjoy the most when it comes to decorating my journal pages.
Again the Christmas Pudding sticker is from the same Paperchase pack from 2014.


Over on this page I had some spare snowflake cellophane I picked up from Wilkos, and attached it over the top of the photo. Because the photo had a lot of black on it, adding the snowflakes helped to break that up, and they also show up really well on the black background. I attached it with staples as glue would have shown through. I then stuck a little collage of stickers and washi tape on top of it.


Last of all I added this photo of me and my boyfriend on Christmas Day both wearing the same Christmas jumper (just in different colours). We did this without knowing, we are currently going long distance so it was a nice little connection we had that made us feel a little closer (Ps. 'Scuse the cruddy lighting he took the photo in, which makes him look like a tomato).
I layered this photo on top of the left over kraft sticky note I had from cutting the corners off for the photo on the opposite page. Then I used my Typewriter Alphabet Stickers from Hobbycraft to add the word 'Matching' below the photo.
I drew some little stars around the photo and added another little collage of stickers at the bottom of the page in the blank space, and that was it!

Even though the Brimbles Boxes have specific themes and uses, they really can be used for whatever you want. Cards, and writing paper can be used as backgrounds or to add a section of journaling to a page, tags and stickers can be used for decoration. You just have to think outside the box and see what you can come up with!

I hope you enjoyed seeing how I used my Happy Mail box for journaling!
Happy New Year!

- Daisy X

MyGreenCow

Saturday, 7 November 2015

Pumpkin Art Page - October Mini Projeect


So this is my second page share from my little October/Halloween Mini Project! (If you want to see the first one I did, you can have a read here) I made the booklet using the Halloween Dividers from the Mrs Brimbles Shop. You can find out a bit more about how I put it together and my initial plans for this booklet, here.
But today I'm going to be showing you a bit of a mixed media art page I did for one of the pages.

A lot of the dividers have patterns and cute Halloween themed things on them already and as I'm using this more like a Smash Book, there's going to be things I don't want to just cover up completely. This was the case for this cute little 'Jack O' Lantern' song, there was an image below the song but I decided to cover that section up and put my own there.


I chose to paint a little pumpkin, I hadn't draw or painted anything free hand in well over a year and that's not really been for any specific reason, I've just been doing other things and I simply forgot that I can actually draw haha.
I sketched out this pumpkin, (if you follow me on Twitter you would have seen the progress shots, here & here) and then painted it with Acrylic paints. I've always been quite fond of using them, I used them throughout school when I was doing my Art GCSE etc. So they are just the type of paint that I'm most comfortable using.
I drew and painted it onto some scrap paper which had a grid pattern in the background, this helped to make it not look 'perfect' I prefer it when things are mis-matched a little and it's not a 'pure' background.


Eventually I watered down some browns and blacks and washed them over the song page, so you could still see what was on it. I also picked out a Journaling card from the Halloween pack I'd got in my October Brimbles Box to go behind the pumpkin, I narrowed it down to three and then had my followers on Twitter choose the one I eventually used. You can see the other options here.
I added a couple of different Washi Tapes to the page, which are both from Cloudy Cow, and also punched out some Stars from the same scrap card I used to paint my pumpkin on.
Lastly I stuck down some of the wood veneer stars, and that's it!

I love how it turned out, my pumpkin is a little wonky and I could probably do better, but I'm pretty proud of my attempt seeing as I hadn't drawn freehand in SO long!

Thanks so much for reading!

- Daisy X

MyGreenCow