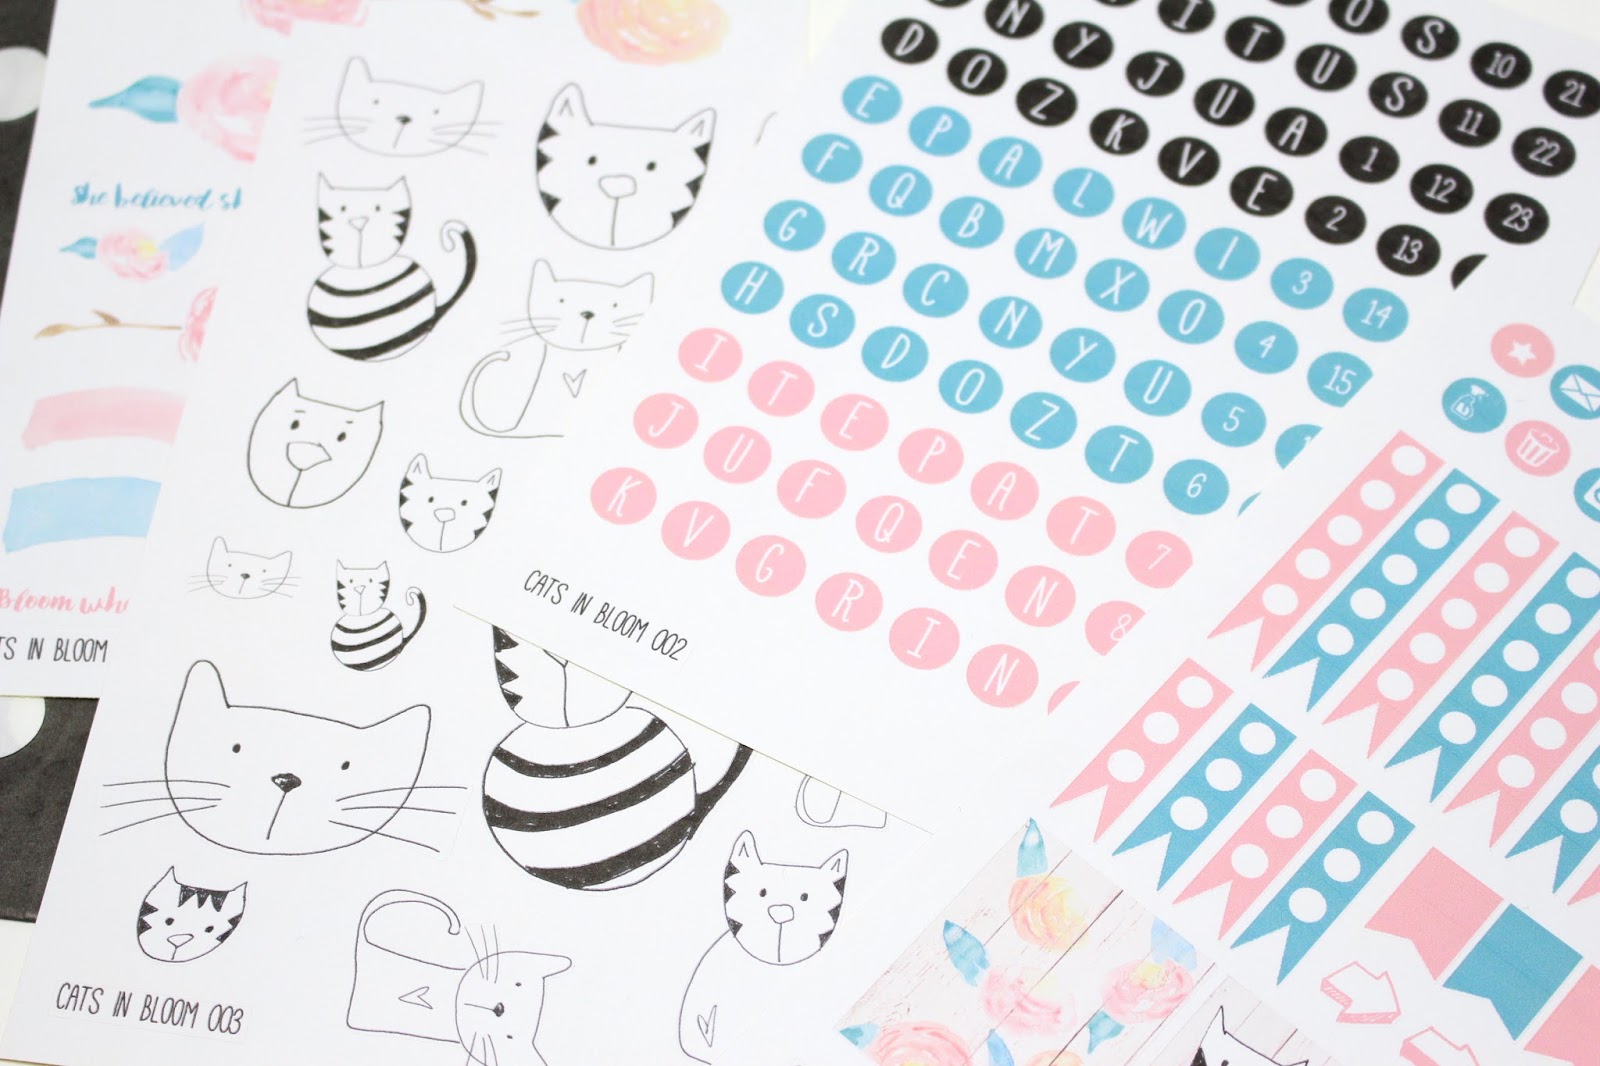
This month's theme was 'Cats in Bloom' which is a pretty unique theme, but Anna has pulled it off really well. I'm loving the pastel pink & turquoise combination!
There's a mixture of Anna's characters (this time they are cats). Then there's some planner themed stickers, some beautiful watercolour florals, and some alphabet stickers! I love the contrast between the delicate watercolours and the black and white sharpness of the cats.
This is the 'planner' style sticker sheet, but like I always say, they are more versatile than you might think. You can definitely use them in journaling, or scrapbooking. The tick box page flags are great if you are documenting lists, or just using as they are as decorative page flags with dots on. You shouldn't always take a craft supply as it comes.
Here are Anna's adorable cats! I love that she uses as much of the spare space on the sheet as possible when she creates these stickers. Who's going to say no to more stickers?! Plus having varying sizes definitely comes in handy. I think my favourite little cat is the one with a heart on it's tum.
Alphabet stickers! YES PLEASE! I love me some alphabet stickers. I love than Anna has decided to go with three different colours on this sheet! So you can completely mix and match with them. Also the numbers are going to come in so handy, the fact that they go up to 30 instead of just being 0-9 is great!
Then the last sheet is this one! Watercolour heaven! How pretty are these designs,?! I'm loving the little hearts filling in some of the gaps on the sheet. Also those little paint streaks will be great for banners at the top of a page, or layering together with some washi on the corner of a photo. I like that they aren't just straight too, it's something a little different.
Also don't forget to check out the rest of Anna's shop here!
- Daisy X
*Please note, even though these stickers were sent to me free of charge, this does not sway my views and opinions. I will always share my honest views on the product and company.
What's this?! Something new from the lovely Mrs Brimbles!
I'm so excited for this, since the Brimbles boxes have come to an end, how do we fill that Brimbles shaped hole in our month? With stickers of course!
Anna had a sticker club before, but now she has got herself a super snazzy silhouette machine, so she has upped her sticker game! This is the Juicy Frootz collection, there's four sheets in the pack and as you can guess they are all themed around fruit. You have a sheet of decorative fruit characters, one with planner checklists, arrows and other shapes, one with washi strips, and then one with full boxes and half boxes! So a really nice variety of stickers.
I will be using these in my next journaling spread, so I'll go more in depth on each sheet then. For now I just wanted to share a kind of 'package opening'/overview of what you get in the pack!
The price of this subscription is just £10 per month + P&P! So it's cheaper than the Brimbles box, and you still get lots of Brimbles exclusive designs. It's a surprise pack so you don't get to know what's in each pack, but Anna does share sneak peaks on her Instagram & in the Mrs Brimbles Happy Place Facebook group!
You can also check out the rest of Anna's shop here.
Thanks for reading, and I look forward to sharing how I end up using these beauties!!
- Daisy X
*Please note, even though these stickers were sent to me free of charge, this does not sway my views and opinions. I will always share my honest views on the product and company.
I've not shared much from my Discagenda yet, but I thought I may as well share one of my February spreads today! I used a lot of the things that came in my February Brimbles Box, along with a few of my favourites that I use every week.
A little run down of what my Discagenda is used for, because I don't use it every day. I use this planner one a week on a Sunday to pretty much gather my thoughts and plans for the week ahead. More than anything it makes me sit at my desk, and wind down at the end of the week. I mark out important dates for the week ahead, write things I want to aim to do on certain days, and pop some weekly goals at the side. I then transfer most things across into my bullet journal planner as that's my functional planner. This is purely for me to enjoy sticking down stickers, and creating a pretty spread, plus I've found that it most definitely helps me to gather my thoughts.
I used the check list stickers on one of the sticker sheets in the February Brimbles Box to mark down some things I needed to remember to take with me to my trip to Nottingham. I found that these stickers work best when you write on them with a permanent marker of some kind. Plain gel ink pens just don't cut it. That's not a massive inconvenience for me though, I always have some sort of marker sitting on my desk!
I used quite a few of these little love bug stickers on this spread, they are so sweet! I combined the pink heart/lace style washi tape that came in the Brimbles box, with some brown squiggle washi tape. Then I added a popcorn sticker and the 'Date Night' sticker to mark a bit of chill time with Jack. He works in hospitality, so his shifts usually mean the closest we come to a date night is collapsing on a sofa with a film and stuffing our faces with popcorn. I'm totally fine with this being our version of a 'Date Night' though haha!
So that's how my planning spread turned out, I definitely love using things that correspond with one another in this planner! The Brimbles box is brilliant for this!
I spent so much of my time at the end of 2016 sorting things out with the house, I didn't have a chance to fully appreciate my Brimbles Boxes during those months. So this month I decided to dig everything out and just go to town with my Brimbles Box goodies!
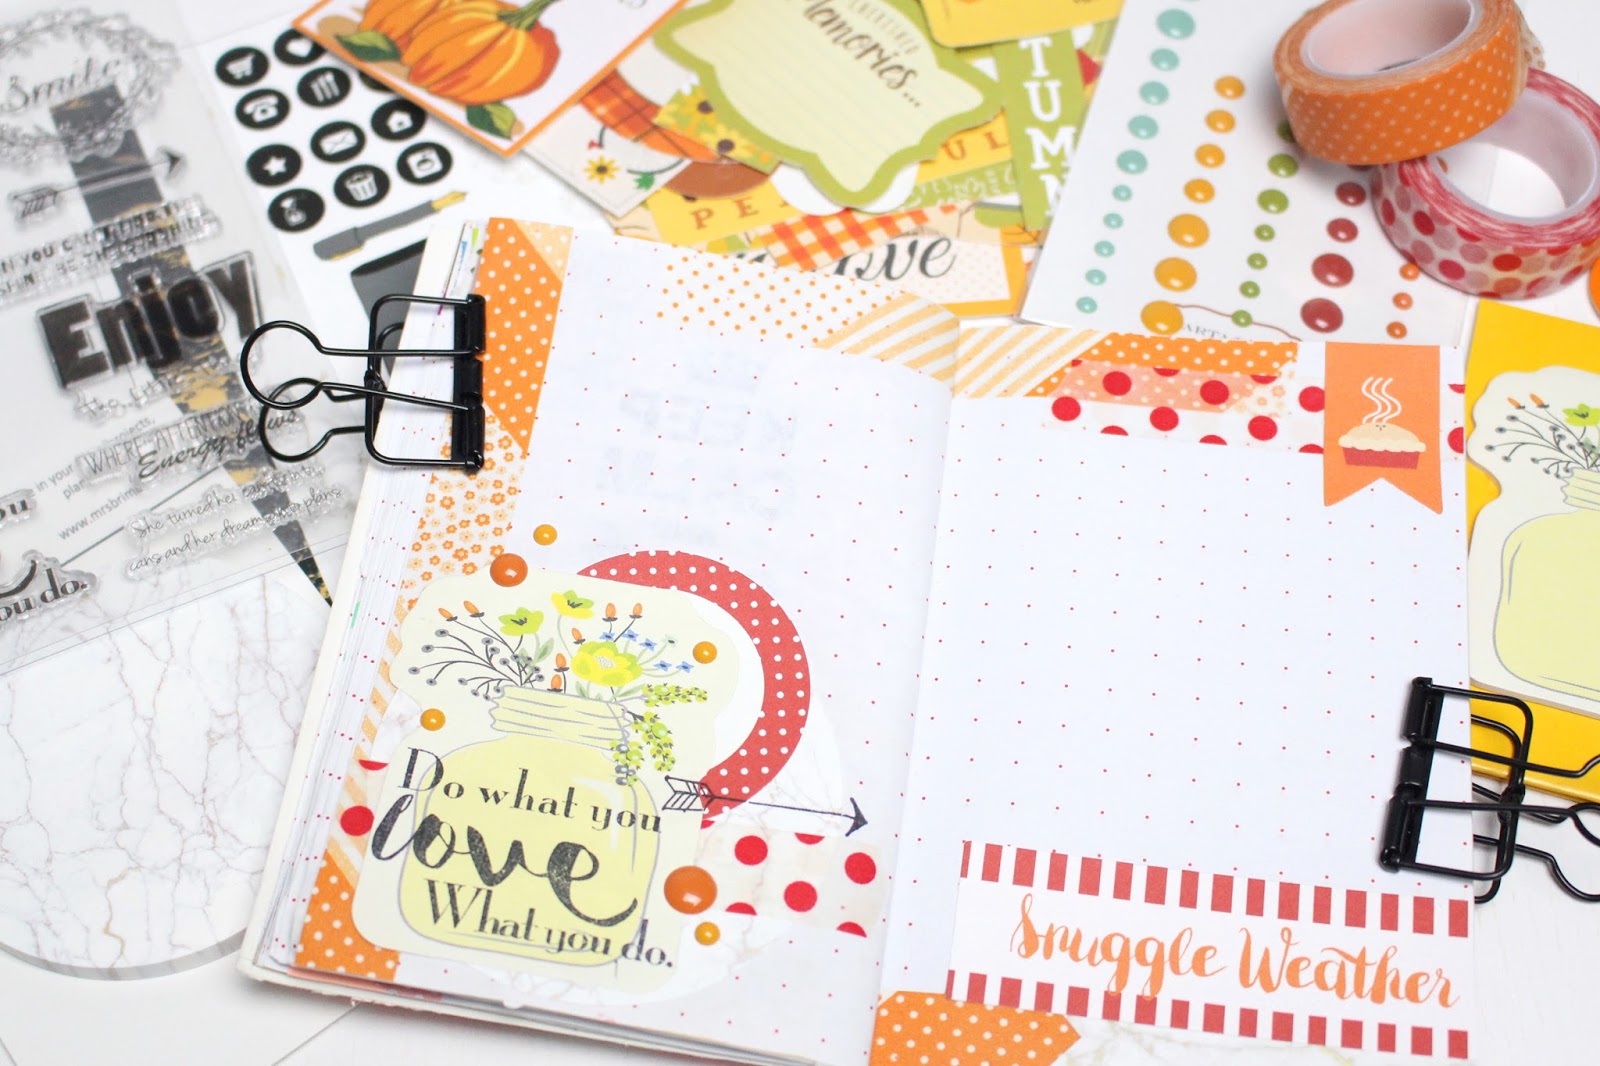
Today I'm sharing a page spread I created, in a travelling notebook! This is someone else's travelling notebook, and about 4 or 5 people had already contributed to it. I chose to decorate two pages in this notebook as the owner had let the contributors choose how many pages they wanted to do.
I dug out my October Brimbles box, a few bits from my Brimbles Advent Calendar and also some things from the January box.
The October box was very autumnal themed, so there was plenty of orange popping up! I decided to go with this as the main colour, and then choose things to work with that.
I used some of the orange washi tape and placed it randomly on the two pages. I used this floral jar sticky note from the Advent box to stamp one of the positive phrase stamps on to (from the January box). I tend to use decorative sticky notes, more like ephemera, than I do as sticky notes.
Once I'd arranged and stuck all these down I popped some enamel dots around the place, and stamped an arrow from the same clear stamp set in the January box, across my layered ephemera.
As soon as I opened my January Brimbles Box, I knew exactly where I was going to use it!
I recently got myself a new work planner in the Kikki-k sale, I went for a nice smart black one this time. The whole 'new year, smarten things up' vibe got me good. But seeing as black, gold and white was the main colour scheme, it meant that the January Brimbles Box was just perfect for this planner!
I decided to make myself some plain dividers out of white card, because even if I move out of this planner, or change up the dashboard somewhen, the sections in this planner will always stay the same. So it makes sense to have something that will go with any colour scheme, rather than remaking them each time.
I put together the DIY marble circle paper clips, I used a bit of E6000 glue and they stuck to the gold paper clip really well. I decided to attach the black marble one to the top of the mini dashboard to break up all the white marble a bit.
It was a very simple DIY but sometimes they are the most fun! Being able to quickly make a few random pieces into something useful, and pretty, is a really enjoyable, and relaxing process.
Of course I had to attach the amazing snowball charm to the planner! It's really nice to look over at my line up of planners and see something a little different, compared to the usual dangly charms I have attached to them. The large lobster clip on the end of it is really handy too, if it's getting in the way at all, or I want to move it about for a photo I don't have to open the planner rings to do so! I just unclip it and move it about.
I'm really happy with my current work planner setup, I love it when a planner is all colour coordinating! The Brimbles Box is definitely perfect for this. Anna's does a great job at designing the products in the boxes so they all coordinate brilliantly!
With this month's Brimbles box I decided to use the contents to decorate my journaling pages.
I recently went to see Zootropolis at the cinema with my brother, and seeing as it was a kind of fun film, the April box had lots of fun bright things that just went really well with what I was journaling about! I absolutely loved working with such bright colours, and fun stickers!
These journaling pages didn't have any photos on, I decided to just use the things I had collected during the day. We actually got given a free sticker book and stickers when we went to see the film, so of course I didn't turn that down. It was a lovely day spent with my brother, and I also beat a few anxiety worries, so definitely a day to be documented! Hence the use of the pink 'Documented' sticker on the page on the left.
I of course kept the cinema ticket to stick in! One of the many reasons I like buying tickets at the cinema rather than online, is because you get a 'proper' ticket. They look a lot nicer in a journal or scrapbook! We also got charged for teen tickets rather than an adult, which was highly amusing. I'm nearly 22 and my brother is 19... But hey! All I said was 'two tickets to see Zootropolis please' so I'm not going to complain if they want to charge us less. I used the cry laughing emoji sticker to represent the 'lols' we got out of that.
On the other side of the flap I stuck another one of the stickers we got, and I popped one of the little sticky tabs from the sticky notes that were in my Brimbles Box. I tend to use any sticky tabs that already have words on, like stickers. Because the film sticker was quite dark, the sticky tab really helps to break up all the dark colours. Without it there, it would have just looked really glum and bland.
I decided to keep my bus ticket from the trip to the train station as this was one of the things I was most anxious about doing. It's a nice little reminder that I managed it, and didn't freak out! I stapled this to the page so it could easily be lifted up, and I could put things underneath it.
Underneath I added one more sticker we got at the cinema, and used this orange 'Admit One' washi tape, which was also from eBay, to decorate around it. I added one of the striped flag banner stickers from the sticker sheet in my Brimbles Box to the corner of the Zootropolis sticker. It felt a little bare without something there, so this small addition helped to fill the gap.
At the bottom of this page I wanted to add a little cluster of washi & stickers, just to help balance the pages out a bit. I went ahead and added some more of the film strip & heart washi, and then added this yummy looking donut sticker! Once we got home I ended up having a nap, watching tv & eating 'crappy' food, even though I didn't have a donut, the donut does represent the type of food I went for, haha!
Once I'd done the journaling I decided to go over random words and phrases with the highlightersthat came in my Brimbles Box. I love this technique when it comes to journaling, but I've never had more than two colours of highlighter to do it with. Now I have a whole set, so I did go a little bit crazy! I love how it turned out though, there was so much colour going on around the edges of the journaling, the written section looked very bare in comparison.
Hopefully you enjoyed seeing how I used a lot of the items from this month's box! I really enjoyed using them to decorate my journaling pages!
Can we say 'Spring has sprung' yet?! Are we officially there? Well spring definitely sprung on this Pocket Letter I made!
If you saw my video on Monday (It'll be at the bottom of this blogpost if you missed it!), then you would have seen that this month most of the ladies in the Mrs Brimbles Design Team are taking part in a blog hop (makes sense, bunnies and all!!).
We used most of the contents of our Brimbles Boxes from March to create some happy mail for one another. I was creating a pocket letter for the lovely Charlie from Sea Salt & Paper!
I'm going to talk through my thought process when creating this pocket letter, if you want to know where all the supplies are from, then take a look at the description on the video, as I listed them all there!
Top Row
So to start things off, in the top left pocket I used part of a Belle & Boo postcard for the backing card. It had a really cute section to write the address on, so I decided to have that side facing forwards. I added some brown twine along the edge as there was a large blank space next to it.
The middle card is part of the postcard from the Brimbles Box, I felt so bad chopping this bunny in half, but I think it turned out looking really nice. Postcards are a nice addition to Pocket Letters as they don't involve too much decorating, of course it'd be a bit boring if you used postcards in all of the pockets. But every now and again it's a good plan if you are struggling with what to fill a pocket with. I also added some of the felt flower shapes to the front, and put a few more of the felt shapes in the back.
The last pocket on this row is a washi pocket! For the backing card I used some packaging from the Belle & Boo letter set, and I wrapped the actual washi tape around some of the packaging from the packet of felt shapes! I put another card with washi tape on in the back of the pocket and added a bit of brown twine to the top so it pokes out.
Middle Row
I used the same pink backing card for the pocket on the left, I decided to use this card a couple of times as I thought the colours were perfect, and as I was going to have a lot going on as it is, I didn't want to add too many different colours into the mix. I made this pocket into a sticker pocket, and added some of the stickers I was putting in the pocket, to the front along with some washi tape for decoration.
The middle pocket was the pocket I had the actual letter in. I chose to use more of the Belle & Boo writing set packaging for this! I debated whether to stick it to some other patterned card, but decided to leave it by itself and have a little see through window instead! I folded up the letter, decorated it, and added that in.
The last pocket on this row was a paperclip pocket. I used the other half of the postcard I used in the first pocket on the first row, as the backing card. But this time I had the front showing. I tried a couple of ways to attach the paperclips, but this way worked the best. I simply stapled a strip of card to the backing card and folded it over, then I just clipped on the paperclips.
Bottom Row
I added another sticker pocket on this pocket letter, I feel like you really can't go wrong with stickers! I'd used a few stickers from this sticker pad on the actual pocket letter, so it made sense to send some in the pocket. The backing card in this pocket, again, was some of the card from the felt shapes packaging!
This middle pocket I decided to try something new. These carrot tags came in the Brimbles Box, and I wasn't sure what to do with them. I did think about painting one, and then I had a pretty simple idea of punching out some shapes in the colours of carrots! I actually didn't have any orange paper to hand, so I used part of a colour guide booklet I'd recently picked up from Homebase. I'm actually really happy with how this turned out, it kind of acts a bit like a shaker pocket!
In this last pocket I added some twine and ribbon. I stapled some 'samples' of the different things I'd included in this pocket to the front of the card, and then on the outer plastic of the pocket I stuck down some washi and stickers for decoration.
This is what the front & back of the finished pocket letter looks like! I really enjoyed challenging myself to use mostly things from my Brimbles Box, I think I did quite well. I tried out some new techniques, and overall I think it looks super Springy!
I added some yellow twine along the left hand side and also going across the bottom section in a bow. This is something that's easy to add to a pocket letter and definitely helps to make that left hand side a little less bare.
I folded up the pocket letter and added a little bit of ribbon, along with this adorable bunny die cut I got from Noodoll. I've been hoarding him for a while, and haven't been sure what to do with him, so I'm glad he is now going to do a bit of travelling!
If you want to see the process video of how I put this pocket letter together, from start to finish, then you can do so here:
Don't forget to head over to Charlie's blog HERE, and have a look at what she created!! Here's a little sneak peak for you:
I hope you enjoyed seeing what I did for this fun little Easter blog hop!
You can find links to all the blogposts in the blog hop on Anna's post which is HERE.
Also don't forget to give them all a follow whilst you are over there! They are all wonderfully creative ladies, and run such lovely blogs.
I hope you all have a lovely Easter weekend, whatever you end up doing!
So as I'm sure you are aware I am on the Mrs Brimbles Design Team, and this month I was sent a few Halloween craft goodies from Anna to have a play around with. At first I really wasn't sure what I was going to do with them. As I've said many times before, the bit I struggle with the most when it comes to any sort of crafting/arty project, is getting started. But I finally figured out what I wanted to do!
So the main thing I'm going to be sharing in this blogpost is what I did with the Halloween Dividers.
The initial thought was to turn them into planner dividers. But I've already got my dividers sorted for this month, so I tried to think about what else I could do with them.
I ended up using the whole set to make into a Halloween/October mini journal/booklet!
It's simply going to be a place for me to document everything I get up to this month, and also a place where I can go wild with anything to do with Halloween. Whether it's art, photos, scrapbooking, .... Just anything I end up doing that's based around Halloween, I will put in here.
To put it together I bought these Silver Rings from eBay, they work similar to planner rings, but they are singular and a little more fiddly! They don't sit straight, instead they wobble about a bit, but that doesn't bother me in the slightest. They keep everything together and that's all I needed them for!
I decorated the front of this little booklet with lots multiple different Halloween stickers, die cuts, washi and twine!
I'll leave some links below to some of the things used:
(Not everything has a link, as it either wasn't bought online or I can't find a link)
I was really happy with how the cover turned out. I do sometimes get a bit carried away with little projects like this and fill every little gap I can see, but I managed to hold back haha!
The tabs going down the side were already on the dividers, but the tabs along the top I added from the Cute/Vintage Halloween Ephemera/Die Cuts pack. The text on all of the tabs isn't there to organise them, they simply have little Halloween phrases on, and are just there for decoration.
Inside I have started to attach things I've received that are Halloween themed. Above is the adorable Ghost postcard that came in my October Brimbles Box!
I have a few ideas of things I want to add in here, and ideas of the activities I want to get up to this month. Like pumpkin carving, baking, watching scary films, all of which can be photographed and stuck in. I know we are half way through October now, but fingers crossed I'll be able to get most of these pages full!
If I don't then I can always take pages out and keep them until next year. That's the good thing about attaching them all with the little silver rings, compared to something like twine! Things can be taken in and out whenever I want.
I hope you've enjoyed seeing the little project I've got on the go this October. Make sure you check Mrs Brimbles' shop to find most of the products used to create this bundle of Halloween fun!
I will be sharing some of the pages I've completed on my blog, so keep an eye out if you want to see how I end up filling this booklet with Halloween goodness.
I will also do a full flip through over on my YouTube channel once I complete it.
Have you got any projects on the go this October?
- Daisy X
*Please note, even though some of these products were sent to me free of charge, this does not sway my views and opinions. I will always share my honest views on the product and company.
(My desk, ft. my boyfriend on my desktop! Check out my intro on Mrs B's blog for more exclusive snaps! X)
So first of all, I wanted to take the time to announce/celebrate being chosen to be a part of the Mrs Brimbles Design Team! Excited is most definitely an understatement!
I know it's been a few weeks since the Design Team was announced, but I've not yet had a chance to mention it on here, so I thought it was about time!
If you would like to have a read of my official introduction then take a nosey over on Anna's blog, by clicking here.
Since I'm on the Design Team, I will be sharing lots of fun projects, stationery goodies and unboxings on here and on my YouTube channel!
I've always loved the products Anna sells and the boxes she puts together, so I'm really happy to be working with her and the other wonderful ladies on the team!
I thought I'd share a couple of snaps of this months Happy Mail Brimbles Box!
The Brimbles box is a stationery/planner/happy mail subscription service (though you can buy an individual box if you like), this means you get a box full of stationery goodies sent to your house every month! I have done an unboxing of this particular box over on my channel, which you can have a look at by clicking here.
There were plenty of gorgeous products in this box, but my favourite is most definitely this 'hello' stamp. I have legit been using it on everything haha! Love it love it love it!!
That's all for today, I just wanted to pop on really and share a little update and a few photos with you guys. If you aren't already following Anna's blog, then head over there and do so! She runs a lovely blog full of all the crafty/planner related adventures she gets up to :)