Showing posts with label planner. Show all posts

Saturday, 26 August 2017

Boxclever Press, Busy Days Platinum Starter Set Review!

You may have seen in the vlog I put up on my YouTube channel last week, where I opened a wonderful package from Boxclever Press. Well in this blogpost I'll be going through everything I received in the package, and sharing what my first impressions!


They sent me the Platinum Starter Set, and inside there was the Busy Days Planner, x2 Sticker books, x6 Washi Tapes, Spare discs, a punch, a clear zip pocket, and then diary inserts from May -August 2017 (which are obviously out of date now, but nice to have if you choose this planner for memory keeping, and want to back track). My first thoughts of this set was that it would make a brilliant gift set. You have everything in here to get started!


The washi tape set included the following designs, B&W fruit line drawings, trees through the seasons, film strip, gold foiled dots, birds sitting on a line, and then some grass washi! The set has a nice variety of tapes to choose from, and will be great when it comes down to using them to decorate the pages in your Busy Days planner. They are all decent length rolls too, the classic 15mm by 10m!


The sticker books were probably one of my favourite things. They've done an amazing job on them, all the stickers are just beautiful and they are such great quality! The sticker books are themed, and I know a few of my blogger friends who also received this bundle to review got slightly different themed sticker books!
Inside there's a page with puffy stickers...


..Then you have two pages of some kinda of vinyl/plastic ones, that are slightly transparent..
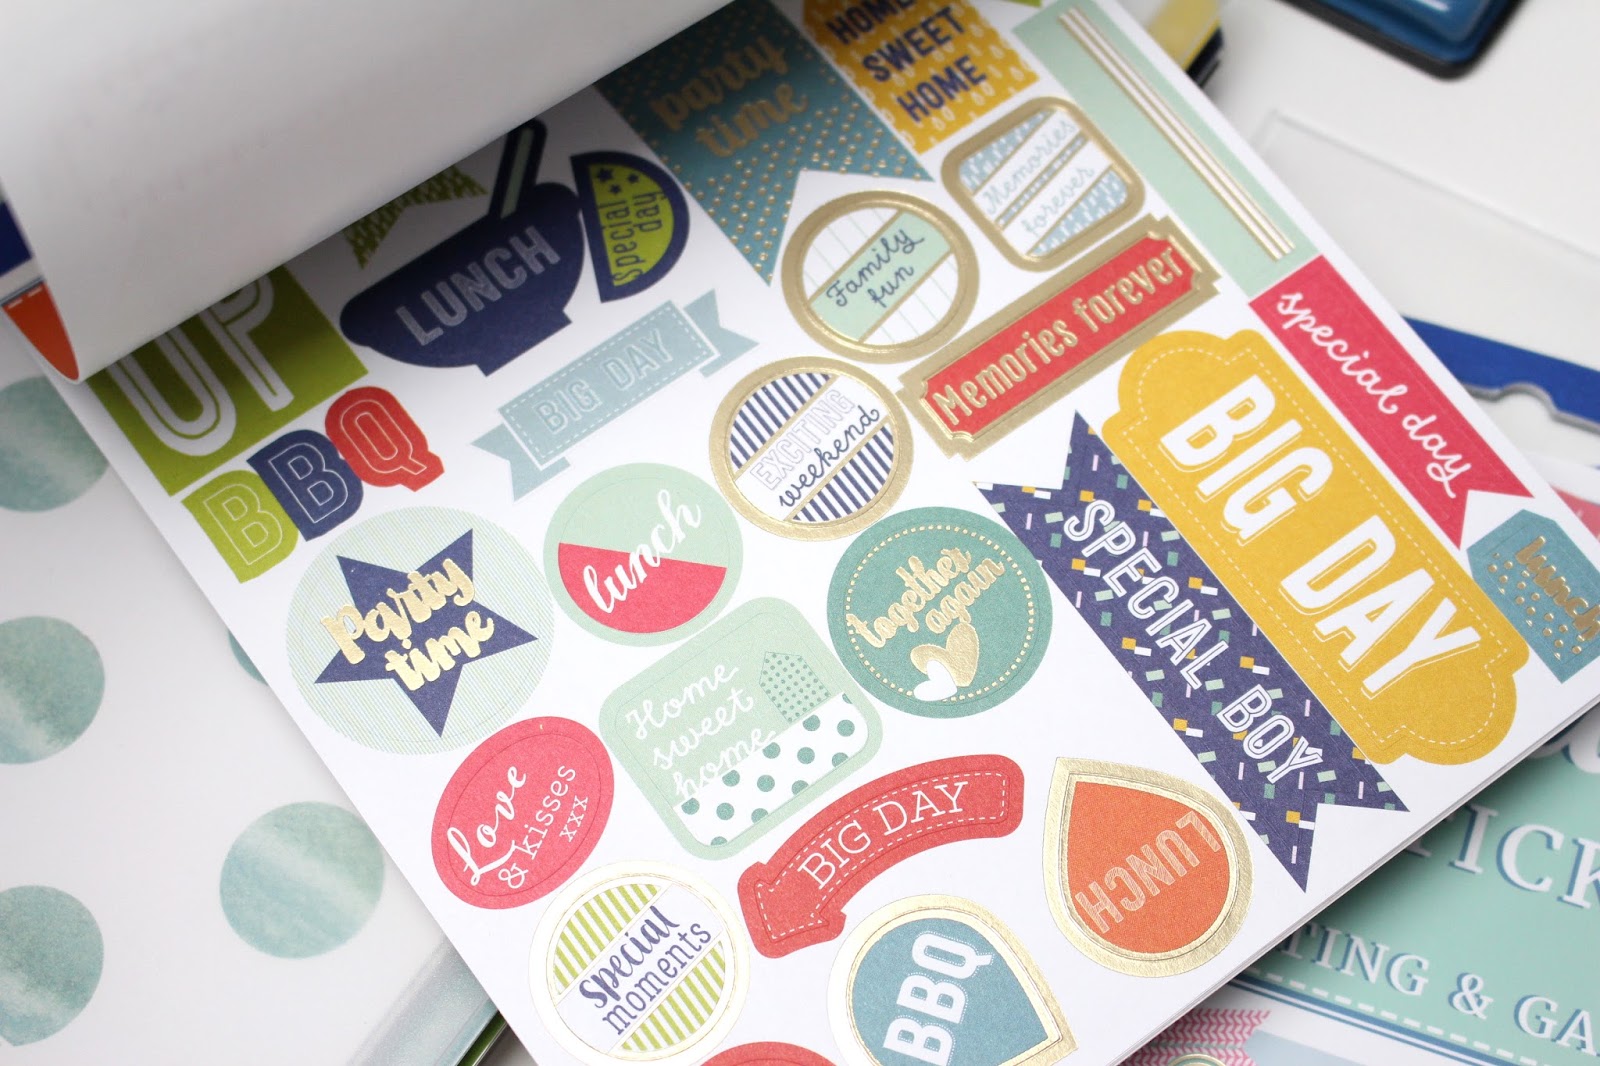

...Then lastly there's three pages of paper stickers with gold foiling on! The colours of all these stickers are so vibrant, and I absolutely LOVE how many you get in here. All of the stickers are unique too, there's no duplicates. 


Here's a photo of the other sticker book I got, this one was themed around baking, and homemade things. They are so great for documenting and decorating! I think one of the best things about these stickers is that there's a nice balance of objects, and then banners and flags. So you have a good choice of what to use when decorating. 


I was very impressed with the punch. This is so you can create your own inserts or use printables, and add them in. Considering this is a disc bound planner, you can't just punch holes in pages with your everyday hole punch, they are a bit more of a specific shape. So this punch will definitely make things a lot easier when it comes to personalising the planner!


It was extremely heavy too, you can definitely tell it's a quality punch, not cheaply made at all. I hate using a punch that feels like it might break every time I punch something. I was trying to find the best way to show you the quality of it in a photo, it's not something that's really easy to show via a computer screen haha. But with all the punches I've come across, this one is definitely one of the better ones!!


The planner itself has a hard plastic cover, with the name of the planner & the Boxclever Press logo on. Personally I prefer my planners to not have a name/wording on the front. This was also the only cover option which again, I like to have a bit of choice when it comes to that kind of thing. But this is a newly launched planner, so I'm sure the Boxclever Press team have lots of plans for the future of this planner regarding colours options!


The tabs in this planner are great, nice quality, evenly spaced and colourful! The font on a planner tab is something I'm a little picky about too, I like simple but bold fonts, nothing too fancy. I really like the one they've used on these tabs. They also have a plastic cover over each of the tabs to make them more durable.


Inside, the pages are somewhat decorated for you, each month has a different sort of colour scheme depending on the season. There's also some monthly goal style pages (shown above) at the start of each month too. I think they look maybe a little 'childish' (I can't think of a better word) with the different shaped boxes and font choice. Some people might prefer this sort of style, but personally I don't. I think consistency throughout the planner is important, and these pages are a little different to the monthly & weekly pages. I don't think there's anything wrong with having a planner partially decorated before you get your hands on it, but it can't look too personalised to suit one persons taste.


The monthly and weekly layouts I much prefer. They are decorated, but not so much that you feel you can't make them your own. The month starts on a Monday which as you guys know by now, I much prefer! The space you have in each box is really decent too. They are a little wider than ones you find on your average monthly insert, I think that a lot of people would benefit from that. So many times I've written something in a box and realised it's too long so had to add a hyphen and put the rest of the word below it. 


Again the decoration on the weekly spread is very similar to the monthly. The way the week is set out is also really different, I've not come across any layouts like this before, but I like it! The colour scheme of the weekly and monthly pages do also change per month, to reflect the season. I also love that each day is split into three sections, that can come in very handy.


At the back of the planner there is a pocket page, which has yet more stickers inside! Anyone who's used a planner in the past will know that pockets come in super handy! So it was a nice little surprise to find one at the back of the planner. It's a double sided pocket so there's basically two pockets here.


Lastly I thought I'd give a little size comparison to a Personal sized Filofax. Just to try and give an idea on how big this planner is. It's a chunk for sure, I'm not 100% sure if I'm a fan of the size. For someone like me who has tried many planners before, I've found the larger ones are just not as convenient. I like to be able to take my planner downstairs with me, or out of the house if I need. This planner I would most definitely say is a desk planner.

Overall, I love the accessories, they've done an amazing job at those!! I think I would prefer the planner being a bit smaller, or at least having the option to choose a smaller size if I wanted. Having some smaller rings might work with making the planner a little more mobile, so you don't have to have the whole of 2018 in there at once. You could carry around a couple of months at a time for example.
The design of the monthly & weekly pages are great, I'm just not so sure on the others, I just wouldn't be able to use them. The funny shaped boxes, and font would put me off.
Something that was very clearly consistent throughout, was that the products were great quality. Nothing stood out as being less quality that the rest, and I loved that.

I think it's definitely worth going for if you are looking for a new desk planner, or alternative way to journal, as there's PLENTY of space on the planning pages to plan things out or even add little photos. Also the accessories and extras they offer in this kit, means you will be able to really build on the planner straight away. You won't struggle with making it pretty, and personalising it!

If you want to check out this Platinum Starter Set, you can click here.
Also be sure to take a nosey at the Boxclever Press website here.
They've got a wide range of planner products, so it's definitely worth a nosey!

- Daisy X

MyGreenCow


*Please note, even though these products were sent to me free of charge, this does not sway my views and opinions. I will always share my honest views on the product and company.

Tuesday, 21 March 2017

Duck Egg Blue Original Filofax Review!

Today I've got this beautiful planner to share with you guys!
I previously reviewed one of the Filofax tablet cases over on my YouTube channel (I'll add that video at the bottom of this blogpost), but they asked if I'd like to review a planner this time. Seeing as I'm a bit of a collector, and genuinely love their planners, I said yes!


I decided to go for the Duck Egg Blue Original Filofax. I've seen photos of this planner shared about the place since it was released, and the colour has always caught my eye. I do own the Nude Original so I'm familiar with the style, but the colour stood out to me, and it was definitely a planner I wanted to have a closer look at. This is the personal sized, but it does come in A5 too.


If you aren't aware of the the 'Original' style of Filofax, it's a leather planner, it has the classic popper clasp, beautiful stitching around the edge, and a very simple layout inside.
The overall look of the planner is very smart, I find this planner to be one of the most enjoyable to photograph because of all it's beautiful features.  It has to be one of my favourite styles of planner Filofax do!


The stitching on the planner has been beautifully done. The thread is the same shade of blue as the planner, so it blends in nicely, but also manages to catch your eye straight away. Subtle features like this is something I really appreciate, and I think is definitely worth pointing out.


On the spine of the planner there's two pieces of silver detailing, I think they are where the rings of the planner are attached, and I've loved that they've kept these on show on the outside.
There's also a small embossing of the Filofax logo at the bottom of the spine, which is very subtle.


When you open the planner up, this is what the inside looks like. The back leather is black, and has a smooth texture to it, not like the patent feel of the blue leather. I love how they've made the inside black, rather than making it the same colour as the rest of the planner, it definitely adds to that 'smart' vibe the planner gives off. 
It also lays flat very easily, there's really no need for much 'training' to get it to do so. If this is something you prefer with a planner then the 'Original' style of Filofax is definitely one to consider!


The left hand side has two card slots, then a strip of elastic that's split into two pen loops, and a larger section (I usually use this larger part for holding paper clips etc.). 
The pen loops are two different sizes, I usually only use the one on the outside. The loop nearer the rings is a lot smaller, and in a kind of awkward place for a pen... I've always doubted if it's meant to be for a pen, or something else maybe?
The Filofax logo & branding is also embossed at the bottom too, in the same subtle way as it is on the spine.


As with all Filofax planners, they come with a full set of inserts. There's dividers, coloured lined paper, grid paper, and the week on two pages diary inserts. Like a lot of people, I will be using different inserts and completely personalising this planner. I'm hoping to use it as some sort of address book/penpal planner. To keep a hold of all the information about my penpals, so I'll likely design myself some custom inserts to fit my needs. But I love that they supply everything you may need if you are new to planning.


At the back of the planner there's another little notepad. I usually leave these in any planners that have them until they run out, because they can some in very handy to quickly jot things down. But this can be removed if needed, or you can slot it in at the bottom so it opens the opposite way.


The leather used for this planner is lovely and soft, it's still an incredibly sturdy planner considering how much you can bend the leather. The feel of this planner is most definitely one of my favourite things about it, it's just lovely to hold and has a brilliant weight to it. 
I'm pretty sure anyone who's ever owned an Original Filofax will understand exactly what I mean!


Last of all this planner is 'patent' meaning the finish of the planner is glossy. I've seen the non patent planners in real life before, and I think I do prefer the patent ones. There's just something about a patent finish to a planner that just makes it feel complete.
Something to remember with any planner you own, you do have to be careful with cleaning them. Some cleaning products can ruin the finish of a planner, so be sure to test things out before using it on the front/somewhere really obvious.


Overall, I love it. The colour was waaaay better than expected, and I'm so happy to have this new addition to my little planner family. 
If you are wanting a planner that's on the smarter side of things, but also fun. The Originals are beautiful, and there's a range of colours to choose from!

You can take a look at the full range of Filofax planners here.
This exact planner can be found here.

If you want to check out the tablet cases they do, you can find them here.
This is also the tablet case review I mentioned at the start if you would like to have a nosey:


I hope you've enjoyed having a closer look at this beautiful planner with me!
Thanks for reading,
- Daisy X

MyGreenCow


*Please note, even though this planner was sent to me free of charge, this does not sway my views and opinions. I will always share my honest views on the product and company.

Tuesday, 14 March 2017

February Discagenda Planner Spread!

I've not shared much from my Discagenda yet, but I thought I may as well share one of my February spreads today! I used a lot of the things that came in my February Brimbles Box, along with a few of my favourites that I use every week.


A little run down of what my Discagenda is used for, because I don't use it every day. I use this planner one a week on a Sunday to pretty much gather my thoughts and plans for the week ahead. More than anything it makes me sit at my desk, and wind down at the end of the week. I mark out important dates for the week ahead, write things I want to aim to do on certain days, and pop some weekly goals at the side. I then transfer most things across into my bullet journal planner as that's my functional planner. This is purely for me to enjoy sticking down stickers, and creating a pretty spread, plus I've found that it most definitely helps me to gather my thoughts.


I used the check list stickers on one of the sticker sheets in the February Brimbles Box to mark down some things I needed to remember to take with me to my trip to Nottingham. I found that these stickers work best when you write on them with a permanent marker of some kind. Plain gel ink pens just don't cut it. That's not a massive inconvenience for me though, I always have some sort of marker sitting on my desk!


I used quite a few of these little love bug stickers on this spread, they are so sweet! I combined the pink heart/lace style washi tape that came in the Brimbles box, with some brown squiggle washi tape. Then I added a popcorn sticker and the 'Date Night' sticker to mark a bit of chill time with Jack. He works in hospitality, so his shifts usually mean the closest we come to a date night is collapsing on a sofa with a film and stuffing our faces with popcorn. I'm totally fine with this being our version of a 'Date Night' though haha!


So that's how my planning spread turned out, I definitely love using things that correspond with one another in this planner! The Brimbles box is brilliant for this!

- Daisy X

MyGreenCow

Saturday, 4 February 2017

January Brimbles Box - Goals Dashboard!

As soon as I opened my January Brimbles Box, I knew exactly where I was going to use it!
I recently got myself a new work planner in the Kikki-k sale, I went for a nice smart black one this time. The whole 'new year, smarten things up' vibe got me good. But seeing as black, gold and white was the main colour scheme, it meant that the January Brimbles Box was just perfect for this planner!


I decided to make myself some plain dividers out of white card, because even if I move out of this planner, or change up the dashboard somewhen, the sections in this planner will always stay the same. So it makes sense to have something that will go with any colour scheme, rather than remaking them each time.
I used the white marble 12 x 12 card stock to make a dashboard. Then I used one of the journaling cards that said 'My goals for the year', to make a little decorative mini dashboard.
I decorated this mini dashboard with various things from the Brimbles Box, including some of the Black floral washi, circular phrase stickers, and some of the clear stamps.


I put together the DIY marble circle paper clips, I used a bit of E6000 glue and they stuck to the gold paper clip really well. I decided to attach the black marble one to the top of the mini dashboard to break up all the white marble a bit.
It was a very simple DIY but sometimes they are the most fun! Being able to quickly make a few random pieces into something useful, and pretty, is a really enjoyable, and relaxing process.


Of course I had to attach the amazing snowball charm to the planner! It's really nice to look over at my line up of planners and see something a little different, compared to the usual dangly charms I have attached to them. The large lobster clip on the end of it is really handy too, if it's getting in the way at all, or I want to move it about for a photo I don't have to open the planner rings to do so! I just unclip it and move it about.


I'm really happy with my current work planner setup, I love it when a planner is all colour coordinating! The Brimbles Box is definitely perfect for this. Anna's does a great job at designing the products in the boxes so they all coordinate brilliantly!

- Daisy X

MyGreenCow

Tuesday, 26 April 2016

Mrs Brimbles' #CambsPlannerCon Event! April 2016

On Saturday I attended the Cambs Mini Planner Con event in St.Neots, hosted by Anna from Mrs Brimbles
I was slightly terrified, but also very excited. Last week was a crazy one for me, I had family visiting, and also the internet decided to play silly buggers on Thursday and it was un-useable until Sunday. So of course my anxiety levels were pretty high before Saturday rolled around. I wasn't going to miss this though!
The event started at 12 noon, and being a Saturday there were no buses to town. I had to ask my dad to drop me in before he started work, which meant a fun 4:45am wake up time for me, and getting the train to London at 6:50am. Once I was at Victoria station, I decided to have a nosey in the shops and ended up buying a few things in HEMA (hehe oops).
After a couple of hours of dossing about the station and wasting time, I then met up with Geraldine (from Geraldine Jayne) and Charlie (from Sea Salt & Paper)! Both of these lovely ladies are members of Anna's Design Team, and both of them I'd never met before!!
We got on our train to St.Neots and managed to miss the stop because we were too busy nattering! Bear in mind though the train didn't do the talking thing, nor did it have the scrolling info above the doorways that all southern trains have, so I'm going to blame it on that haha.
We got off at the next stop and went back, and eventually we made it to the event!


When we got there, there was already a load of people there. We found some empty seats and got our planners out! I decided to take my Lyradori and my Geometric Filofax, I thought there would be a lot of the new Websters Pages TN's there, so I went for something a little different. 
The first part of the event was spent chatting to everyone and finding out what planners people at brought with them. Anna also brought tons of stuff from her shop with her, so lots of people were having a nosey and buying bits and pieces.


We then had Geraldine & Anna's talks, which were incredibly inspiring. I'm pretty sure everyone came away from the event with something new they wanted to try! You can watch Geraldine's talk here & Anna's talk here.
I didn't manage to talk to as many people as I'd have liked to whilst I was there, because it was a very jammed packed event! But I did get to talk to a few lovely ladies. There were a lot of shop owners there too, who were handing out business cards, and I also received this little sticker sample sheet from Small Stuff Creations, which is just adorable. You should definitely check out her shop, she sells teeny weeny stickers! Perfect if you are a pocket planner user!


There were of course goody bags that were given out at the event, us DT members goody bags were a little different to everyone else's, Anna knew we wouldn't mind having a little less in ours, and a lot of the goodies in there were things from past Brimbles boxes so we would most likely already have them. I thought it was a great that Anna had done that for the goody bags, if anyone missed out of previous Brimbles Boxes, it's like they got a little sample from each!


These were the other bits and pieces I got at the event. There was a letter from Hannah (which, if you are reading this Hannah, thank you so much!!). There's also the business cards I received from Sticker Sunshine & Stitch N Weave, and all the washi sample swaps I chose! I brought 41 samples with me, but gave most of my tickets away because I definitely didn't need 41 back haha. I just picked up a few that I didn't already have, I did keep four tickets incase I wanted to go back later and have another nosey, but I didn't have any time to. But that does mean I can pop them in my journal so it's all good!


I didn't manage to get many selfies with people, so I've had to nick a couple of photo's from Geraldine! I don't know why but I'm not the type of person who's great at whipping out a camera for selfies, I just never remember to. I think my brain is going a mile a minute at this sort of event, so after I've managed to put sentences together my brain just forgets about everything else haha.
Anyways I'm glad there were some people on the ball, and snapped some photos!


This was our table at the event, minus Geraldine (who is taking the photo) & Charlie (who had to rush off for her train!) I'm pretty sure by this point my brain was turning off, and a lot of people had started to head home. At one point I did feel a panic attack coming on, surprisingly not because of the talking/social aspect, but just the hot, crowded room. I managed to prevent/suppress it, but boy have I been feeling the after math of that over the past couple of days. Overall I did really enjoy the event, and I would definitely attend another one of these, hopefully next time I'll get to talk to more people!!

Massive hugs, claps, and woo wooooo's, for Anna & Jon for pulling it all off, and making the afternoon thoroughly lovely!

- Daisy X

MyGreenCow

Saturday, 19 March 2016

Kikki-k Goodies | March 2016

I'm sure a lot of you have already seen the video I did on my new Wellness Planner from Kikki-k. But I wanted to put together a little blogpost sharing not just the planner, but also the other things I got on my trip to Kikki-k a couple of weeks ago.
I've shared them briefly on videos, it's tricky to show details on there though. I bought three things from Kikki-k, the Wellness Planner, a notepad and a pen from their new cat collection!


I did hold back from buying the whole shop, I thought three things wasn't tooo much of a splurge.
Plus I did try to get in the mindset of 'only buy things you know you can use, not just because they are pretty'. So a pen, a notepad and a pretty planner... I got 2 out of 3 with that mindset, I think I did well. If you haven't been to any of the Kikki-k stores in London yet, then definitely go and have a nosey! You can most definitely make a stationery shopping day trip in London as there's stationery shops dotted all over the place.


As I said before the pen I got was from the new cat collection. But not being the biggest cat fan (they are cute and everything but I don't go gah gah for them), I went for something that didn't have cats on. I love the Kikki-k pens, I have a few already! They are very smooth to write with and the perfect size for most planner loops. The design on the barrel was just different trees with pop's of mint and peach dotted about! Simple but fun, my favourite sort of design!


The notepad I bought isn't just a plain old notepad (I have like 10 of those so that would have been silly y'no....), it has beautifully patterned pages!
There's a mixture of lined, gridded and plain paper, but they all have super cute decoration on them. Above is just one of the 20 different designs throughout the notepad (there's 120 pages). The versatility of a notepad like this is what made me buy it. The size of it is brilliant, it's not quite A5, but it's not A6 either .. It's somewhere in between. I know I will for sure be using this for journaling, the pages easily come out so I can use them as background paper (I always prefer using paper rather than card stock in my journals as I don't like to bulk them out too much). They would also be perfect for writing letters on, and you could trim them to go into personal or pocket sized planners.


The planner I got is the Wellness Planner, it's a planner which is based on improving your wellbeing. I've done a whole video flipping through all the inserts, so if you want to know exactly what's inside then make sure to watch that (I'll leave it at the bottom of this blogpost). Like the yellow & pink planners by Kikki-k, this one is also textured. I quite like the textured planners as they tend to not show up scratches or marks as obviously, overall they just feel a lot more durable.


The rings and other metal parts on the planner are light gold! Which is my favourite type of gold. 
The foiling on all the dividers also matches this, which just works so well. The rings on the planner were perfect, and I did get to check them in store before purchasing. This is one of the perks of buying in store, just ask one of the shop assistants if you can open it up and take a look at the rings, they will be fine with it. It's much better checking there, than getting home and finding you have a dodgey set of rings.


I was debating whether to make my own dividers for this planner, but for the first time ever I'm going to have a go at using the dividers it came with. The gold foiling just matches so well with the planner and I feel like it'd be a shame not to use them. As I'm going to be trying out all the inserts, and it'll be totally new ground for me (I've not used any inserts like this before). It just makes sense to keep things simple and stick with what it comes with, then alter as I need to in the future!


One of the things that I wish they did in all the planners, was have an extra 'fun' sticker sheet. All planners come with the tab and banner stickers for you to use. But this one had a really cute sheet of inspirational stickers! It's just a little extra perk to this planner. 

I hope you enjoyed having a closer look at the goodies I picked up in London the other week, when I visited the Kikki-k store!
If you want to see the video I did on the Wellness Planner then you can watch that here:


You can find direct links to all the products here:


Let me know if you have any questions!

- Daisy X

MyGreenCow